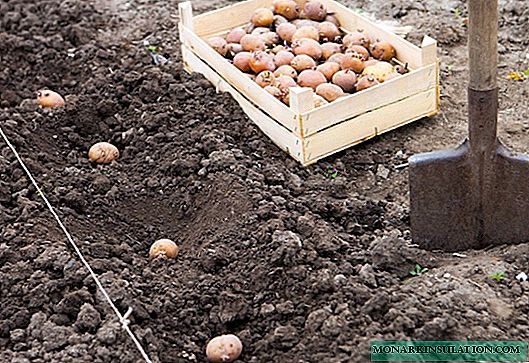
When it comes time to plant potatoes, many summer residents think about how to improve their harvest. There are several common and not quite typical options for this.
Under the shovel
This is a very famous old grandfather method. Not cunning and simple - it is in demand among many summer residents who have no desire and time to look for new, more modern ways of landing.
On plowed ground, make holes with a shovel, 5-10 cm deep, 30 cm apart, leaving 70 centimeters between rows. We spread seed potatoes in them. Add humus, compost and cover it with earth. Align with a rake after planting to prevent moisture loss.
It is very important to choose the right landing time. At the top, the soil should be 7-8 degrees and thaw about 40 cm. It is also not recommended to be late, otherwise the spring moisture will leave.
The advantage of this method is that it is suitable for any site and does not require any supernatural equipment.
Dutch way
This simple way helps to harvest a crop of excellent quality (about 2 kg from the bush). But it requires more attention and care. It is necessary to properly handle special means from pests and carry out preventive measures before planting and after it.
Potatoes are planted in the soil. At a distance of 30 cm, a width of 70-75, make rows from north to south. Before each planting, a little fertilizer in the form of humus and a bit of ash are put in each hole, then a potato tuber is sprinkled with earth on both sides, forming a comb. The main thing in time to remove weeds and spud. As a result of this, the ridges rise by about 30 cm, and the bush receives the necessary substances and a sufficient amount of light. The soil beneath a hill of earth has enough oxygen and passes it to the roots.
The advantage of this system is that too much water or drought is no longer dangerous for tubers. Since with a large amount of water it rolls between rows, and with drought there is protection against evaporation.
Into the pits
With this option, planting for each tuber makes its own pit about 45 cm deep and about 70 cm wide. Fertilizers are put at the bottom and planted potatoes are planted. As soon as the tops of the leaves grow, they add more ground, maybe even there will no longer be a hole, but a half-meter hill.
The disadvantage of this option is that you need a lot of effort to prepare the pits. And the plus is in saving space.
Under the straw
This method does not take much time. Potato seeds are laid out on the surface of moist soil, at a distance of 40 cm. Lightly sprinkled with earth and covered with a layer of straw 20-25cm. Straw is used as an obstacle to weeds and retains moisture. Spud such potatoes in an unusual and simple way - adding a little bit of straw. The first crop can be tried in 12 weeks.
The downside is that there is a chance of rodents.
Under the black film
This planting option is suitable for those who want to get a faster crop. Black color attracts light, which allows early seedlings to appear and accelerates the growth process.
Dig the land for planting and fertilize. Then cover with black material and make holes in a checkerboard pattern 10 by 10 cm for tubers. When the time comes for harvesting, the tops are cut and the black material is removed.
The disadvantage of this method is that there are difficulties with watering.
In bags, crates or barrels
This is a mobile method - it allows you to move the structure without damaging the potatoes. And also does not take up much space and allows you to harvest twice as much as usual.
Bags
You need to take bags of dense material that allows air to pass through. Bending the edge, fill it with moist soil by about 20 cm. Then put the tuber of sprouted potatoes and fill it with the same layer of soil. Having placed the structure in a sunny place, they lightly add it. It is only necessary to water on time, unscrew the bag as it grows and fill it.
Barrels and Boxes
In a barrel or box, the bottom is removed, about 20 cm of soil is poured. Potatoes are laid out and again covered with earth. As the shoots are covered with earth. It is placed vertically against the wall, small holes are made for air and for the drain of large quantities of water.
The downside is that it will take a lot of containers to plant a large number of vegetables.
Mitlider method
Flat ridges or ridges are made from north to south with a width of 50 cm and a row spacing of up to 1 meter. If you replace them with long boxes, then the question of hilling will disappear.
In excavated and fertilized soil, holes 10 cm deep are made in a checkerboard pattern on a bed in two rows. With the help of the groove that formed in the center, you can water and fertilize.
It is important to know that after this method of planting, you should change the place next year.