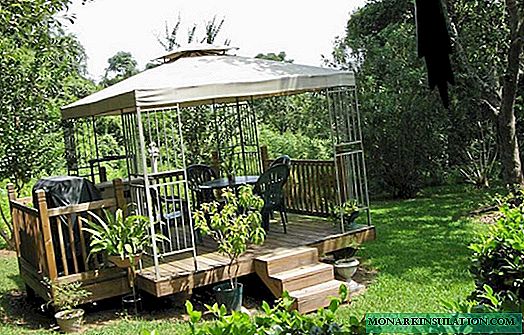
Last summer, I planned to improve the suburban area a bit. Slightly reduced allotments for garden beds, but allocated additional meters for a recreation area. The free space was enough for a small flower garden, a couple of bushes, an inflatable pool. But for a good rest this was not enough. Need a gazebo. Its construction, I decided to do during the holidays.
Initially, I planned to do something very simple, like a canopy on four pillars. But then, after consulting with familiar builders, I realized that it was quite possible to build a more complex structure. Also on poles, but with walls and a full roof.
I had to sit down at the blueprints, sketch the project. On paper it turned out the following: a wooden arbor 3x4 m, on a columnar foundation with a gable roof covered with slate. The project was approved at the family council, after which I rolled up my sleeves and set to work. All stages of the work were carried out alone, although, I must admit, in some moments the assistant would not interfere. To bring, file, trim, hold ... Together, it would be easier to work. But, nevertheless, I managed it myself.
I will try to describe the stages of construction in detail, since the little things in this matter were very important.
Stage 1. Foundation
According to the plan, the gazebo should be light in weight, built of boards and timber, so the most optimal foundation for it is columnar. With him I began my construction.
For this purpose I took a suitable platform near the fence for the size of the arbor 3x4 m. I put pegs (4 pcs.) In the corners - here will be the foundation columns.

Marking the corners of a future gazebo
He took a shovel and dug 4 square holes 70 cm deep in a couple of hours. The soil on my site is sandy, it does not freeze much, so this is quite enough.

Recesses for foundation columns
In the center of each recess, I set out on a reinforcing bar with a diameter of 12 mm and a length of 1 m. These will be the corners of the gazebo, so they need to be installed clearly in level. I had to measure the diagonals, the length of the perimeter and the vertical armature.

Marking with a thread of diagonals and the perimeter of the base of the gazebo
After dismantling the old buildings on the site, I still have a bunch of broken bricks. I put it on the bottom of the recesses, and poured liquid concrete on top. It turned out a concrete base under the columns.

A broken brick pillow for a concrete base will contribute to an even distribution of pressure between the foundation and the ground

Brick base concrete
Two days later, the concrete froze, on the foundations I built 4 brick columns in level.
4 columns are ready in the corners, but still the distance between them turned out to be too large - 3 m and 4 m. Therefore, between them I installed 5 more of the same columns, only without reinforcement in the center. In total, supports for the gazebo turned 9 pcs.
I plastered each support with a solution, and then - I missed it with mastic. For waterproofing, on top of each column, I laid 2 layers of roofing material.

Brick columns support will serve as a reliable foundation for the base of the gazebo
Stage 2. We make the floor of the gazebo
I started with the lower harness, on it, in fact, the whole frame will be held. I bought a bar 100x100 mm, cut it in size. To make it possible to connect in half the tree, at the ends of the bars I made a saw with a saw and a chisel. After that, he assembled the lower harness, according to the type of designer, stringing the beam on the reinforcement in the corners. I pre-drilled the holes for the reinforcement with a drill (I used a drill on a tree with a diameter of 12 mm).

Assembly of bars in the design of the lower harness
The bars were laid on the foundation posts - 4 pcs. along the perimeter of the gazebo and 1 pc. in the center, along the long side. At the end of the process, the tree was treated with fire protection.

The lower harness, laid on the columns of the foundation, will serve as a crate for the plank floor
It's time to block the floor. Since ancient times, oak boards of just the right size - 150x40x3000 mm - have been dusting on my household, and I decided to use them. Since they were not quite even and a little crumpled, I had to drive them through the gage. The tool was available to my neighbor, it was a sin not to use it. After the leveling process, the boards turned out to be quite decent. Although shavings formed as many as 5 bags!
When choosing material for the gazebo, it is important to find a manufacturer you can trust. For example, you can get high-quality oak boards here: //stroyassortiment.ru/shop/suhaya-dubovaya-doska/
I nailed the boards to the nails. The result was an even plank oak floor.

Oak plank floor
Stage 3. Wall construction
From the existing beam 100x100 mm, I cut 4 racks of 2 m. They will be installed in the corners of the gazebo. From the ends of the racks I drilled holes and put them on reinforcing bars. They especially did not hold the vertical and strove to move at the most inopportune moment. Therefore, I fixed them with jibs, specially trimmed for this business in the miter box. He nailed the ukosins to the floor boards and racks. Only after this the racks no longer leaned to the side and did not sway from the wind.

Stands in the corners of a future gazebo
When the corner posts were installed, I secured another 6 intermediate posts. Also fixed them with jibs.
Then he cut off 4 beams and, by analogy with the lower strapping, secured the upper strapping at the upper ends of the racks. The joining of the timber was also carried out in half-tree.
A series of horizontal railings came up. They will form the walls of the gazebo, without which the whole structure will look like an ordinary canopy. I cut the railing from a bar 100x100mm, and for the back wall I decided to save a little and took a 100x70 mm board. Exclusively for the crate, such a lightweight version will fit.

Arbor frame with racks, rails and harness
To install the railing, I made tie-ins in the racks, installed horizontal bars in them and hammered nails. Since it is assumed that they will lean on the railing, it is impossible to leave such a connection. We need additional fastening parts for rigidity. In this capacity, I used additional jibs that knocked out the bottom of the railing. I didn’t put the jibs on the back wall, there I decided to fasten the railing with the corners from below.
After everything done, I took up the appearance of the wooden elements of the gazebo. To begin with - polished the whole tree with a grinder. I did not have another tool. Therefore, I took the grinder, put on it a grinding wheel and set to work. While cleared everything, it took a whole day. He worked in a respirator and glasses, because a lot of dust was formed. At first she flew into the air, and then settled down, wherever she wanted. The whole structure was covered by it. I had to take a rag and a brush and clean all dusty surfaces.
When there was no trace of dust, I varnished the tree in 2 layers. Used for this varnish-stain "Rolaks", the color "chestnut". The design shone and acquired a noble shade.

Arbor frame painted with 2-layer stain and varnish stain
Stage 4. Roof truss
The time has come to lay the foundation of the future roof, in other words, to expose the rafter system. The roof is a regular gable roof consisting of 4 triangular truss trusses. The height from the ridge to the harness is 1m. After calculations, it turned out that it was such a height that looks on the arbor in proportion.
For rafters, boards of 100x50 mm were used. Each farm I made up of two rafters connected by a screed. On top, on both sides, are OSB linings nailed around the perimeter with nails. According to the plan, the rafters rest on the upper harness, so I made tie-ins at their ends - in size suitable for the harness. I had to tinker a bit with the insets, but nothing, in 2 hours I dealt with this.

Roof trusses assembled from boards and fastened on top with OSB overlays
I installed farms every meter. At first he exhibited, maintaining the vertical, then - fixed with self-tapping screws. It turned out that cope with the rafters is not so easy. Then I regretted that I did not take anyone as assistants. Tormented for an hour, I still set them, but I advise everyone who follows in my footsteps to ask someone to help at this stage. Otherwise, you can get a skew, then you certainly have to redo everything, which obviously will not add you enthusiasm in your work.
Since the roof of the gazebo will not be subjected to increased loads, I decided not to put the ridge beam, but to fasten the rafters together with a crate of 50x20 mm board. There were 5 pieces of wood on each ramp. Moreover, 2 of them I filled on both sides of the ridge at a distance of 2 cm from the tops of the truss trusses. In total, the crate for each slope was composed of 2 extreme boards (one “holds” the skate, the second forms the removal of the slope) and 3 intermediate ones. The design turned out to be quite strong, it will not work out anymore.

The crate connects the truss trusses and will serve as the basis for the fastening of slate
At the next stage, I opened the rafters and the floor with two layers of varnish stain.
Stage 5. Wall and roof cladding
Next - proceeded to lining the sidewalls with a pine lining. At first, he filled 20x20 mm bars under the railing around the perimeter, and nailed the lining to them with small nails. The back wall was completely blocked, and the side and front - only from the bottom, to the railing. At the end of the process, he painted the lining with a varnish-stain.
Only the roof remained unfinished. I covered it with colored slate with 5 waves, color - "chocolate". Nine sheets of slate went to the entire roof, and on top the ridge element was also brown (4 m).

The wall cladding with a pine lining will protect the internal space of the gazebo from the wind and the sun

Colored slate looks no worse than modern roofing materials, and in terms of durability it far exceeds them
A little later I plan to make removable windows in the openings to protect the space of the gazebo in the winter. I will knock together the frames, insert some light material in them (polycarbonate or polyethylene - I have not decided yet), and then they will install them in the openings and remove them as necessary. Perhaps I will do something similar with the doors.
In the meantime, perhaps all. I think that this option will appeal to those who want to build a gazebo quickly, simply and inexpensively.
Grigory S.


